Logitech Quickcam E3500 mit fswebcam unter Linux

Da die meisten üblichen Verdächtigen unter den Webcamtools leider nicht funktioniert haben, habe ich ein wenig bei Freshmeat gegraben und fand schließlich fswebcam.

Dieses Programm funktioniert ausgezeichnet mit dem UVC Treiber und meiner Logitech Quickcam E3500.

Auf der Kommandozeile kann man im einfachsten Fall so ein Bild vond er angeschlossenen (und hoffentlich betriebsbereiten)  Cam machen:

fswebcam -d v4l2:/dev/video1 --resolution 640x480 --jpeg 90 --save "`date`.jpg"

Angenehmer geht es, wenn man sich ein simples Konfigurationsfile erstellt. Dann reicht der Aufruf von fswebcam mit der Option für ein Konfigurationsfile und dem entsprechenden File. Hier ein Beispiel:

#
# Webcam grabbing configuration for fswebcam
# Camera: Logitech QuickCam E3500
#
# (c) 2008 by Matthias Arndt <marndt@final-memory.org>
# http://final-memory.org/
#
# Use at your own risk!
#
device v4l2:/dev/video1
resolution 640x480
quiet
no-title
# adjust path + filename of suitable TrueType Font
font /usr/local/share/fonts/arial.ttf:16
# define JPG quality
jpeg 90
# filename for saving the captured image
save /home/marndt/WWW/webcam.jpg

Abschließend einfach mal ein Beispielschnappschuss :-)

(jaja, es ist etwas finster bei mir in der Bude)

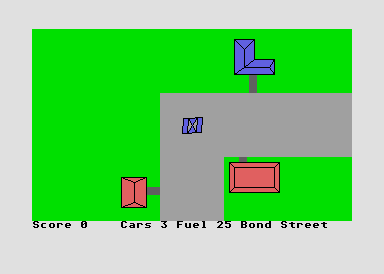
Taxi

Another golden oldie for Atari ST from ASM Software :)

This Taxi driving game runs in ST-LOW. Drive around the town, pickup guests and deliver them to their destinations. Make sure not to crash, run out of gas or violate red traffic lights.

The game was written in GFABASIC and features minimalistic graphics and no sound. However a highscore table has been embedded and keyboard control is possible.

TAXI for Atari ST

Download Taxi for Atari ST

Volume Label für Memorysticks und Speicherkarten unter Linux

Linux bzw. KDE zeigen bei einem Memorystick den Volumenamen an, wenn einer vergeben wurde. Dies kann etwa mit Windows geschehen, aber bislang fehlt unter KDE eine einfache Möglichkeit.

Ein Workaround besteht darin, die mtools zu benutzen und dabei insbesondere das Kommando mlabel:

  1. Annahme: Der USB-Stick oder die SD Karte wird als Partition /dev/sdf1 eingebunden.
  2. Dann kann man mit dem Kommando
    mlabel -si /dev/sdf1 ::

    das vorhandene Label auf die Konsole ausgeben.

  3. Um ein neues Volume Label zu vergehen, lässt man die Option s weg:
    mlabel -i /dev/sdf1 ::

Beim nächsten (automatischen) Mounten sollte Linux dann anstelle “Wechseldatenträger 511MB” das vergebene Label ausgeben, z.B. für das Desktopicon.

Huawei E220 UMTS MINI USB Modem – set PIN

Huawei E220 HSDPA Mini USB Modem

To enter the PIN for your Huawei E220 HSDPA Modem under GNU/Linux without using a terminal emulator, ASM Software offers you the following interactive Perl script. Make sure to have kdialog installed. Kdialog is used to display the GUI.

The program checks if the modem is connected to the USB system and asks you for your PIN. Finally it tries to program the modem with the PIN you have entered with the proper AT command. A message is shown to reflect the status of the operation.

This code is based upon various sources which automate PIN setting on various UMTS data devices.

Download the script packed with Gzip: enterPIN.gz

ASM Software Webseite integriert

ASM Software Logo

Wie aufmerksame Leser sehen, habe ich heute eine große Anzahl von Artikeln eingestellt. Diese stammen alle von meiner alten Homepage für selbstgeschriebene Software. Selbige Seite wird ab heute stillgelegt, ihr (soweit relevanter) Inhalt wurde hier eingepflegt und kann über die Kategorie “ASM Software” abgerufen werden. Natürlich sind alle Progrämmchen, Skripte und Goodies zum Download verfügbar.

Davon ab musste ich auch mal wieder was sinnvolles für mein Blog tun ;)

emu51 under GNU/Linux

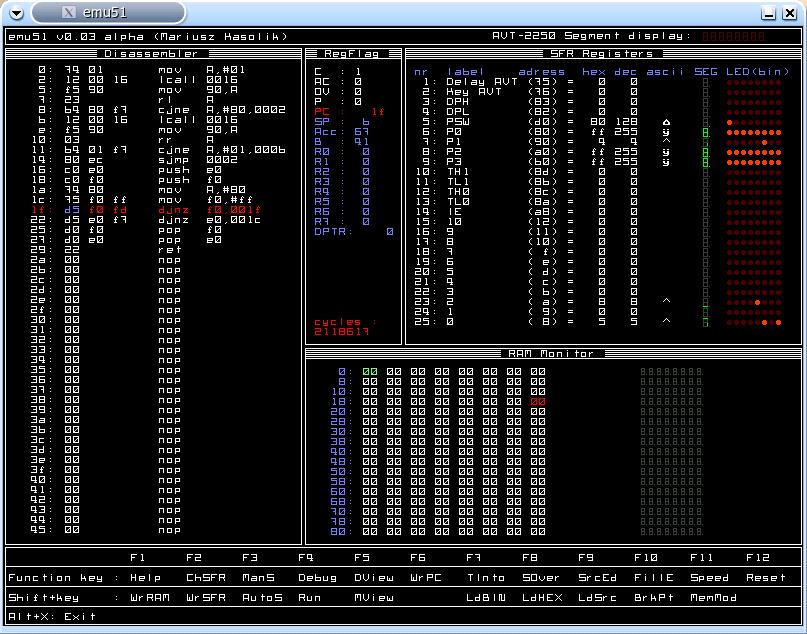
ASM Software was able to build and run the 8051 emulator emu51 (http://emu51.sourceforge.net/) under GNU/Linux.

Download the source distribution, make sure you have the Allegro library installed, and now compile emu51 with this Makefile.

The emulator seems to work but keep in mind it is very early alpha and the interface not that easy.

If you use SDCC, make sure to issue the packihx command first. emu51 has problems with reading the .ihx output of SDCC properly.

Once a port to the SDL library was planned but the project was abandoned due to lack of time.

SDCC tutorial

This is a small tutorial how to invoke and use the Small Devices C Compiler (SDCC).
SDCC can be found at http://sdcc.sourceforge.net/. It is a cross compiler for ANSI C with various MCU targets including MCS51, PIC14 and Z80.
All testing has been done under GNU/Linux and the instructions to build and operate SDCC under other operating systems may vary considerably.

Building the compiler

The compiler comes as a standard GNU package as sourcecode licensed under the GNU General Public License. Just go to http://sdcc.sourceforge.net/ and grab a current source distribution. Now follow these simple steps to build, test and install the compiler:

  • change to a directory of your choice to build the compiler ~/src/ might be an optimal choice
  • $ tar xvzf path/to/sdcc/source/sdcc*.tar.gz
  • $ cd sdcc
  • $ ./configure
  • $ make             # this will take some time!
  • $ su -c “make install”
  • now typein your root passwort to install the SDCC system into /usr/local

To build SDCC, you will need GNU Make, GCC, Flex and somemore tools. A standard GNU development and compiling environment should suffice.

First test

The first compiler test is simple: just type at your shell prompt:

  • $ sdcc -v

If you see the following output in your terminal, all went well and SDCC was properly installed on your system.

SDCC : mcs51/gbz80/z80/avr/ds390/pic16/pic14/TININative/xa51/ds400/hc08 2.4.8 #977 (Mar 202005) (UNIX)

Now SDCC is installed and should be ready to build programs for any supported MCU.

Your first program

As I have a mcu board with a MCS51 compatible controller, we’ll assume from now on that you will want to develop your C program for a MCS51 target.
Write your C program with your favourite editor, make sure to include 8051.h to gain access to all 8051 SFRs.

#include <8051.h>

Write a simple program like the following:

#include <8051.h>
void main(void)
{
int i=1;
P1=0;  /* clear PORT1  of the MCS51 – P1.7 used as LED output */
for(;;)
{
P1_7=!(P1_7);   /* toggle P1.7*/

for(i=1;i<15000;i++);
/* idle loop – eat CPU time */

}
}
Now save it as porttest.c.

Now build your C program by typing:

  • $ sdcc porttest.c

SDCC will output an awful lot of temporary and listing files while compiling the program. If all goes well, you will get an Intel HEX file called porttest.ihx.

It is a good idea to use the packihx command on the resulting .ihx as the output of SDCC is not compatible with all loaders. It works with IO redirection:

  • $ packihx <input.ihx >output.hex

By default SDCC will relocate your program to address 0x0 including a proper interrupt vector table in case you have defined interrupts from C. That is possible, just refer to the SDCC documentation. Now put the HEX file into your code memory and run it.

Relocating your program to a different location

Sometimes you will not want to relocate your program to run from 0x0. Perhaps you have a board with RAM mapped as code memory and it does not start at 0x0. Using assembly language you would simply put an ORG 0x4000 or similar into your source. SDCC has to be instructed with a compile time parameter to achieve the same effect.
Try:

  • $ sdcc –code-loc 0x4000 porttest.c

SDCC will now compile and build your program as usual but it will now have its reset vector and interrupt vector table relocated to 0x4000 and up. This means to run your program now, you have to run your code with a jump or similar from 0x4000.
Important: SDCC will still generate the interrupt vector table but it will not be initialized at the proper location. Your startup code or some sort of utility has to copy the contents of the C code interrupt vectors into the MCS51 interrupt table by hand to activate it.

Alternate output file format

SDCC cannot only output your program as a Intel HEX file but also in Motorola S-Record format. Just use a commandline like this:

  • $ sdcc –out-fmt-s19 –code-loc 0x4000 porttest.c

In case you need different output formats you can use the SRecord software package to convert from Intel Hex or Motorola S-Record to many lesser known file formats.

Using the C library

SDCC comes with a implementation of the standard C library known as libc under GNU/Linux. You can use it as normal but note that you’ll have to implement your own functions for putchar() and getchar(). All other terminal I/O functions use these and you have to link your program with a serial I/O driver and put proper putchar() and getchar() functions in. Interestingly putchar() and getchar() are no macros but real functions in SDCC contrary to the ANSI C standard.

Last words

For more detailed documentation, especially on usable memory models, inline assembler and interrupt handling, refer to the excellent SDCC documentation which should be included in your SDCC source package.
This concludes our little SDCC tutorial and we hope you will be able to get started with software development in C for your MCU with the SDCC system.

small SDCC projects and sources

This page contains some simple projects and programs for use with the SDCC compiler and a 8051 compatible mcu.

register definition for Atmel T89C51CC02
This register definition include file is for use with the SDCC compiler. It is based upon the faulty one supplied by Atmel.
Download (7k)

A/D convertor access for Atmel T89C51CC02
This sample C file for the SDCC compiler supplies a simple routine to measure voltages with the builtin analog-digital convertor of the Atmel T89C51CC02.
The routine works with simple polling.
Download (0.7k)

register definition for Oki MSM80C154S and MSM83C154S
This is a register definition include file for use with the SDCC compiler. It mainly defines the IOCON register and its different bits.
(NOTE: This register definition comes included with SDCC since version 2.6)
Download (1.8k)

SIO Test
A simple test program to initialize and use the SIO of a 8051 mcu from the SDCC compiler using autobaud detection and polling variants of putchar() and getchar().
Download (3.6k)

Delay
A simple routine which uses inline assembly to give a delay routine. It waits for 100ms on a MCU clocked at 12MHz with default of 12 cycles per instruction.
Download (0.5k)

MicroSIO
A small lib for use with SDCC and a 8051 target for using the SIO in polled mode without disabling a running SIO IRQ. It is intended for use with the Tasking Monitor and a preconfigured SIO. The routines  have been tested with my development board. A Makefile for multiple file SDCC project include.
Download (1.5k)