AVR Einstieg Teil 1

Meine Absicht in AVR Mikrocontroller einzusteigen, habe ich ja schon in der Vergangenheit  kundgetan. Jetzt wird es konkret.

Ich habe mir bei Pollin ein relativ günstiges Evaluation Board bestellt und gleich ein paar ATmega16 Chips dazu.

Angeblich ist das Board mit Ponyprog kompatibel und daher müsste ich es über avrdude ansprechen können. Ich werde es erfahren, wenn das Paket da ist.

Etwas konkrete Fortbildung und was zum Basteln und Entdecken ist immer gut – und im Gegensatz zu meinem 2003 gekauften 8051 Board von Phytec, hält sich der finanzielle Aufwand in Grenzen. Board und Zubehör für die AVRs kosten mich im Moment ca 30€, während ich damals 160€ bezahlt habe. Dafür ist das Phytecboard vermutlich stabiler und besser dokumentiert, aber man kann nicht alles haben.

Ich warte dann mal auf die Lieferung warten und werde dann berichten.

Einstieg in AVR Mikrocontroller – die Toolchain

AVR logo
AVR logo

Im Laufe der Woche habe ich lange nachgedacht und beschlossen, mich prinzipiell mit weiteren Mikrocontrollern zu Fortbildungszwecken zu beschäftigen. Bislang habe ich praktisch einiges mit 8051er gemacht, aber modernere Architekturen sind doch sehr einladend. Vorallem möchte ich mal Erfahrung mit echten RISC-Architekturen sammeln.

Längere Zeit habe ich damit geliebäugelt, ein Board mit ARM zu kaufen. Leider sind ARM Prozessoren nicht so 100% hobbytauglich, da sie in aller Regel nur 3Volt Ein- und Ausgänge haben. Ferner kommen sie nur in SMD-Technik daher, was das Löten für Grobmotoriker wie mich extrem verkompliziert, wenn nicht sogar unmöglich macht. Ferner ist mein Interesse sehr Lowlevel, was I/O an geht. Ethernet und CAN-Anwendungen reizen mich im Moment auch nicht. Da das Lernziel sowieso Praxis mit Assemblercodierung für RISC-Architekturen ist, ist ein Controller, auf dem ein Linux läuft, nicht so 100% das was ich suche.

Schließlich habe ich mich dann doch für beliebte Bastleralternative entschieden und werde mich in Zukunft ein wenig mit AVRs von Atmel beschäftigen. AVRs passen zur Not ins Steckbrett, sind extrem tolerant, was die äußere Beschaltung angeht, haben einen schönen RISC-Kern und sind untereinander durchaus kompatibel.

Außerdem gibt es Support,  eine gute Community und last but not least erschwingliche Starterkits. Ich plane mir demnächst ein STK500 zuzulegen. Das wird supported, kann auch mit freien Tools unter Linux angesteuert werden (Die Programmiersoftware avrdude behauptet das jedenfalls von sich) und es ist gleichzeitig ein erstes Evalboard, mit dem man die ersten Schritte ohne Bau von Hardware machen kann.

Letzteres ist für mich recht wichtig, da ich zur Zeit keinerlei Löt- und Bastelausrüstung hier habe.

Für den Anfang habe  ich mir erstmal unter Linux die nötigen Tools installiert, darunter Assembler, Linker, C Compiler und die spezielle C Library für AVRs. Ich habe mich an diese Anleitung hier zur Installation der avr-libc gehalten. Es hat soweit geklappt. Mangels echtem AVR konnte ich aber bislang noch kein Programm flashen oder testen. Aber übersetzen und HEX-File erzeugen funktioniert soweit ganz gut.

Nebenbei habe ich einiges über die GNU Toolchain gelernt, unteranderem daß der GNU Assembler architekturunabhängig relokatiblen Objektcode erzeugt und erst der Linker legt die genaue Position im Speicher fest. Fernen spuckt er grundsätzlich erstmal Binärdateien im ELF Format aus. Aber mit dem objcopy Programm kann man dann Intel HEX erzeugen. Wenn man andere Toolchains gewöhnt ist, ist das natürlich etwas umständlich. Andererseits ist es aber auch recht flexibel, und wenn es automatisch gemanaged wird (s.u.), will man ja nicht viel mehr.

Hinweis: Zum Selberkompilieren der Toolchain sind temporär ca 3GB freier Plattenplatz erforderlich. Die GCC Sourcen sind ein ziemlicher Moloch während der Übersetzung.

Da ich in letzter Zeit sowieso viel mit Eclipse und CDT gearbeitet habe, habe ich auch gleich das AVR Plugin dazu installiert. Damit kann man gleich ein Codeprojekt für die AVR Toolchain aufsetzen und alles wird halbwegs sinnvoll konfiguriert. Das gefällt mir sehr gut. Man muss seine Makefiles nicht selber schreiben und man kann direkt aus Eclipse heraus avrdude konfigurieren und aufrufen. Im Prinzip stellt man nur den gewünschten Prozessor und die Taktrate ein und kann dann fröhlich loscoden.

Mehr wenn ich echte Hardware habe!

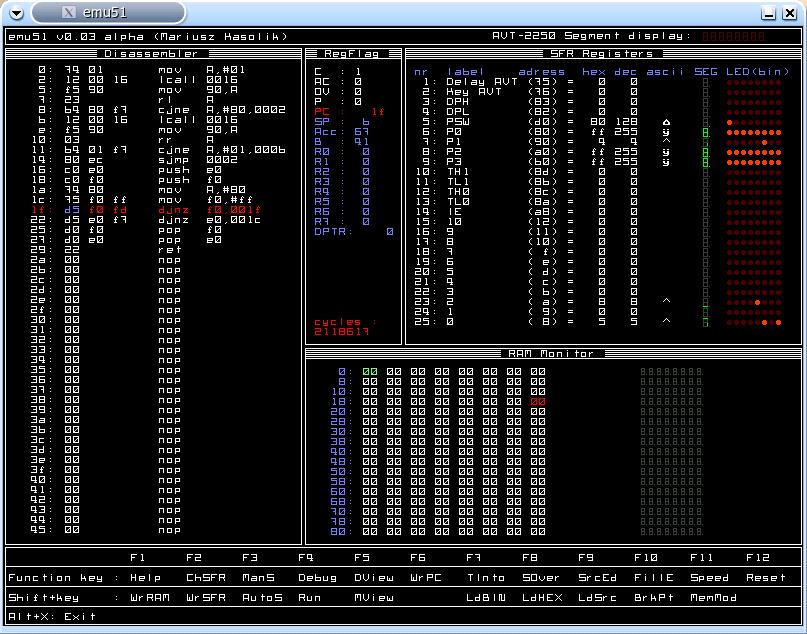
emu51 under GNU/Linux

ASM Software was able to build and run the 8051 emulator emu51 (http://emu51.sourceforge.net/) under GNU/Linux.

Download the source distribution, make sure you have the Allegro library installed, and now compile emu51 with this Makefile.

The emulator seems to work but keep in mind it is very early alpha and the interface not that easy.

If you use SDCC, make sure to issue the packihx command first. emu51 has problems with reading the .ihx output of SDCC properly.

Once a port to the SDL library was planned but the project was abandoned due to lack of time.

SDCC tutorial

This is a small tutorial how to invoke and use the Small Devices C Compiler (SDCC).
SDCC can be found at http://sdcc.sourceforge.net/. It is a cross compiler for ANSI C with various MCU targets including MCS51, PIC14 and Z80.
All testing has been done under GNU/Linux and the instructions to build and operate SDCC under other operating systems may vary considerably.

Building the compiler

The compiler comes as a standard GNU package as sourcecode licensed under the GNU General Public License. Just go to http://sdcc.sourceforge.net/ and grab a current source distribution. Now follow these simple steps to build, test and install the compiler:

  • change to a directory of your choice to build the compiler ~/src/ might be an optimal choice
  • $ tar xvzf path/to/sdcc/source/sdcc*.tar.gz
  • $ cd sdcc
  • $ ./configure
  • $ make             # this will take some time!
  • $ su -c “make install”
  • now typein your root passwort to install the SDCC system into /usr/local

To build SDCC, you will need GNU Make, GCC, Flex and somemore tools. A standard GNU development and compiling environment should suffice.

First test

The first compiler test is simple: just type at your shell prompt:

  • $ sdcc -v

If you see the following output in your terminal, all went well and SDCC was properly installed on your system.

SDCC : mcs51/gbz80/z80/avr/ds390/pic16/pic14/TININative/xa51/ds400/hc08 2.4.8 #977 (Mar 202005) (UNIX)

Now SDCC is installed and should be ready to build programs for any supported MCU.

Your first program

As I have a mcu board with a MCS51 compatible controller, we’ll assume from now on that you will want to develop your C program for a MCS51 target.
Write your C program with your favourite editor, make sure to include 8051.h to gain access to all 8051 SFRs.

#include <8051.h>

Write a simple program like the following:

#include <8051.h>
void main(void)
{
int i=1;
P1=0;  /* clear PORT1  of the MCS51 – P1.7 used as LED output */
for(;;)
{
P1_7=!(P1_7);   /* toggle P1.7*/

for(i=1;i<15000;i++);
/* idle loop – eat CPU time */

}
}
Now save it as porttest.c.

Now build your C program by typing:

  • $ sdcc porttest.c

SDCC will output an awful lot of temporary and listing files while compiling the program. If all goes well, you will get an Intel HEX file called porttest.ihx.

It is a good idea to use the packihx command on the resulting .ihx as the output of SDCC is not compatible with all loaders. It works with IO redirection:

  • $ packihx <input.ihx >output.hex

By default SDCC will relocate your program to address 0x0 including a proper interrupt vector table in case you have defined interrupts from C. That is possible, just refer to the SDCC documentation. Now put the HEX file into your code memory and run it.

Relocating your program to a different location

Sometimes you will not want to relocate your program to run from 0x0. Perhaps you have a board with RAM mapped as code memory and it does not start at 0x0. Using assembly language you would simply put an ORG 0x4000 or similar into your source. SDCC has to be instructed with a compile time parameter to achieve the same effect.
Try:

  • $ sdcc –code-loc 0x4000 porttest.c

SDCC will now compile and build your program as usual but it will now have its reset vector and interrupt vector table relocated to 0x4000 and up. This means to run your program now, you have to run your code with a jump or similar from 0x4000.
Important: SDCC will still generate the interrupt vector table but it will not be initialized at the proper location. Your startup code or some sort of utility has to copy the contents of the C code interrupt vectors into the MCS51 interrupt table by hand to activate it.

Alternate output file format

SDCC cannot only output your program as a Intel HEX file but also in Motorola S-Record format. Just use a commandline like this:

  • $ sdcc –out-fmt-s19 –code-loc 0x4000 porttest.c

In case you need different output formats you can use the SRecord software package to convert from Intel Hex or Motorola S-Record to many lesser known file formats.

Using the C library

SDCC comes with a implementation of the standard C library known as libc under GNU/Linux. You can use it as normal but note that you’ll have to implement your own functions for putchar() and getchar(). All other terminal I/O functions use these and you have to link your program with a serial I/O driver and put proper putchar() and getchar() functions in. Interestingly putchar() and getchar() are no macros but real functions in SDCC contrary to the ANSI C standard.

Last words

For more detailed documentation, especially on usable memory models, inline assembler and interrupt handling, refer to the excellent SDCC documentation which should be included in your SDCC source package.
This concludes our little SDCC tutorial and we hope you will be able to get started with software development in C for your MCU with the SDCC system.

small SDCC projects and sources

This page contains some simple projects and programs for use with the SDCC compiler and a 8051 compatible mcu.

register definition for Atmel T89C51CC02
This register definition include file is for use with the SDCC compiler. It is based upon the faulty one supplied by Atmel.
Download (7k)

A/D convertor access for Atmel T89C51CC02
This sample C file for the SDCC compiler supplies a simple routine to measure voltages with the builtin analog-digital convertor of the Atmel T89C51CC02.
The routine works with simple polling.
Download (0.7k)

register definition for Oki MSM80C154S and MSM83C154S
This is a register definition include file for use with the SDCC compiler. It mainly defines the IOCON register and its different bits.
(NOTE: This register definition comes included with SDCC since version 2.6)
Download (1.8k)

SIO Test
A simple test program to initialize and use the SIO of a 8051 mcu from the SDCC compiler using autobaud detection and polling variants of putchar() and getchar().
Download (3.6k)

Delay
A simple routine which uses inline assembly to give a delay routine. It waits for 100ms on a MCU clocked at 12MHz with default of 12 cycles per instruction.
Download (0.5k)

MicroSIO
A small lib for use with SDCC and a 8051 target for using the SIO in polled mode without disabling a running SIO IRQ. It is intended for use with the Tasking Monitor and a preconfigured SIO. The routines  have been tested with my development board. A Makefile for multiple file SDCC project include.
Download (1.5k)

ASM Software Monitor-52

amon52 – “a monitor for 8052/compatible mcu”

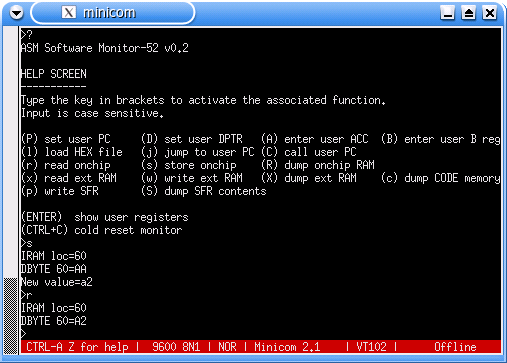
ASM Software Monitor-52 is a monitor/debugger for 8052 compatible mcus with the possibility to have code memory mapped into external RAM like my development board by Phytec does.

THIS IS A EDUCATIONAL PROJECT WITH THE PURPOSE ON LEARNING HOW IT HAS TO BE DONE. IT IS NOT MEANT TO BE USED COMMERCIALLY OR TO BE SOLD.

amon52 features:

  • almost no IRAM usage: uses register bank 2 for internal data and bank 3 for work
  • user program have register banks 0 (default) and 1 at their disposal
  • monitoring of registers for user program
  • IRAM read/write/dump
  • XRAM read/write/dump
  • SFR monitoring
  • code memory viewer
  • loading Intel HEX files into XRAM
  • jumping and calling user code
  • interrupt vector copy to XRAM (including forwarding into a user program)
  • welldefined and known jump table for access of monitor routines by user programs
  • SIO running on Timer 2
  • only valid input is echoed – you can’t type wrong chars!
  • Interface protocol is designed in a way that an external program on your PC can interface with amon52. This should allow to run a nice GUI debugger in the future.
  • more things to come in the future

The current state of the project is not completely functional, buggy, tailored to be run from inside the Tasking monitor and comes without documentation or warranty.

ALPHA SOFTWARE – DO NOT USE IN PRODUCTION SYSTEMS UNTIL FURTHER NOTICE!

This monitor source is specially configured to work with the PHYtec microMODUL-8051. It should work on any board with few changes necessary. (Mainly comment the Phytec memory init routine out.)

Screenshots

screen shot of v0.2 running on my board

Download
Version v0.2 (May 15th 2006) (13.5k)
Version v0.4 (May 17th 2006) (53k)

Release Notes
v0.2 – initital open release, contains bugs and not all functionalities
v0.4 – release with all major features implemented, probably NOT bugfree

Compiling

To compile amon52, you will need Asem-51, SDCC and GNU Make.

Tools and files for 8051 compatible microcontrollers

Here you can find some tools, configuration files and generic information regarding MCS51 compatible mcus.

as31 assembler for Intel 8051 derivates

This is a patched version of the famous as31 assembler. It is now compatible with our development board. And can therefor be used with other Phytec 8051 boards and units as well. The original of the assembler can be found at Paul’s 8051 tools.
Download (83.5 K)

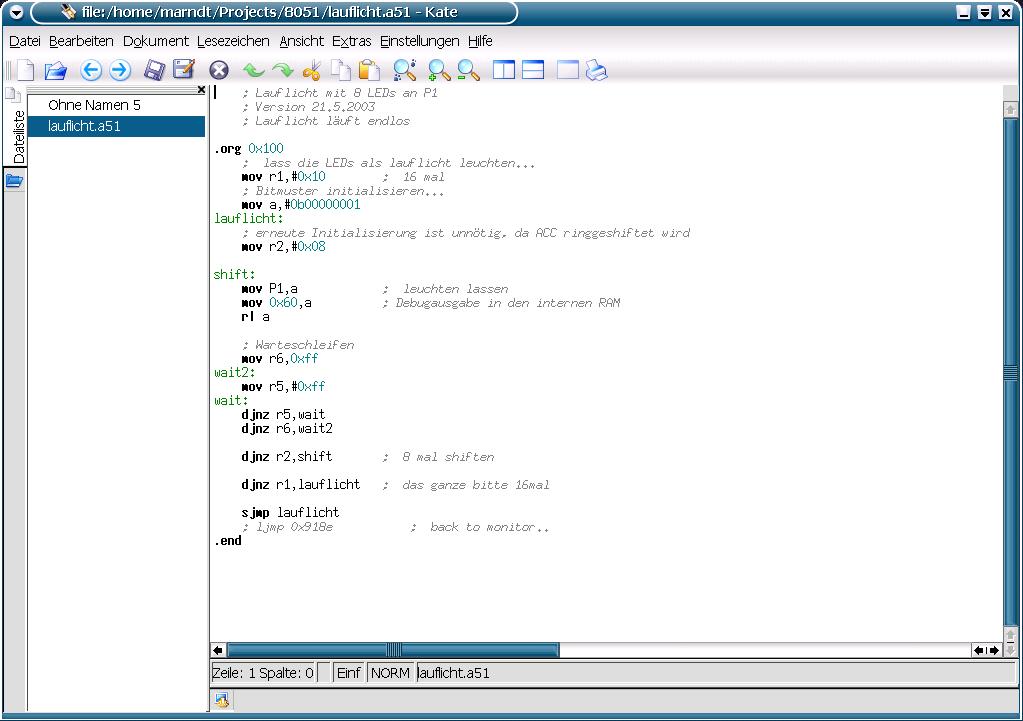
Intel 8051 assembler syntax highlighting definition for the editor Kate

A simple syntax highlighting definition for the text editor Kate for highlighting as31 source files.
Assigns itself for .a51 extension.
Download .xml file (5.7 K)